Using the Windows Password Protector
What is Password Protector
Password Protector is a tool for setting up directory protection so that visitors will be required to enter a username and password to view the contents of a directory. Using Password Protector, you can add and remove the protection on directories and manage the usernames that can access the protected directories.
Manage users with access to view the protected directory
The next step is to add users who will be allowed access to this directory. Remember that these users will also have access to any subdirectory of the selected directory unless it has its own permissions and users.
- Log in to your Domains dashboard and go to the Windows Password Protector.
- Select the directory (see above) where you wish to manage users.

- Enter the username and password for each user you wish to add, then click Add User.
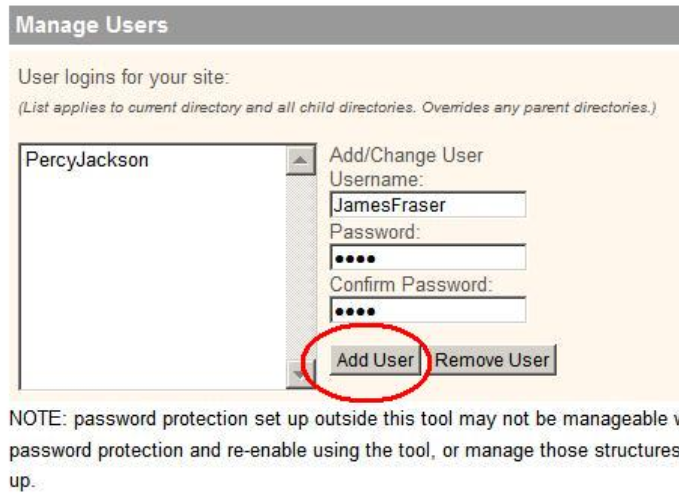
- To remove a user, select the username you wish to remove from the list, then click Remove User.
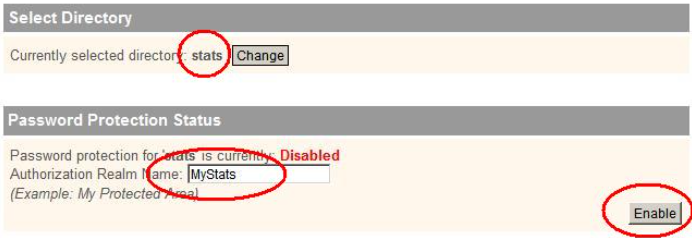
Select the directories to password protect
The first step in this process is to select the directories on your website you wish to protect. Placing protection on these directories means that only selected users would be able to access these directories after logging in with their username and password.
- Log in to your Domains dashboard and go to the Windows Password Protector.
- Click on Change.
- Navigate the directory tree till you find the directory you wish to protect.
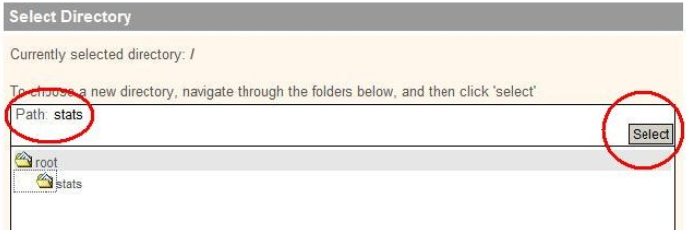
- Click the directory name in the tree - it should appear in the Path line.
- Click Select.
- Verify that your chosen directory appears under Select Directory.
- Give this directory a different name to identify it to the users who will have access to it (in this example, we called it MyStats).
- Click Enable.